
Panasonic Bread Machine Instruction Manual: A Comprehensive Guide
Welcome! This manual details operation for Panasonic bread machines like the SD-R2550‚ offering 31+ programs for breads‚ doughs‚ cakes‚ and jams – a complete baking resource.
Understanding Your Panasonic Bread Machine
Panasonic bread machines‚ such as the SD-R2550 and other popular models (SD-YR2540‚ SD-YR2550‚ SD-R2530‚ SD-B2510)‚ are designed for convenient‚ automated baking. These appliances offer a range of pre-programmed settings – up to 32 – for diverse creations‚ from classic whole wheat loaves to delicate cakes and even homemade jams.
Understanding the machine’s capabilities‚ including its automatic programs and loaf size options‚ is crucial for achieving optimal results. This guide will help you navigate the features and unlock the full potential of your Panasonic bread maker‚ ensuring consistently delicious baked goods.
Model Overview: SD-R2550 and Other Popular Models
The SD-R2550‚ currently available for around $299.99‚ is a versatile automatic bread machine boasting 20 pre-set programs. Panasonic offers a diverse lineup‚ including the SD-YR2540 (32 programs)‚ SD-YR2550 (31)‚ SD-R2530 (30)‚ and SD-B2510 (21).
These models cater to varying needs‚ from basic bread baking to specialized recipes like pizza dough‚ brioche‚ and cakes. Choosing the right model depends on your desired features and baking frequency. A comprehensive list of 21 user manuals is readily available online for these Panasonic bread making machines.
Key Features and Benefits
Panasonic bread machines excel in versatility‚ offering 20 to 32 automatic programs for diverse baking needs. Benefits include consistently fresh‚ homemade bread – wholewheat‚ pizza dough‚ brioche‚ cakes‚ jams‚ and more! The SD-R2550‚ for example‚ simplifies baking‚ even for beginners.
While some models lack a viewing window (like the SD-R2550)‚ their functionality remains impressive. These machines deliver convenience and allow for customized recipes‚ catering to various dietary preferences and lifestyles.
Automatic Programs: A Detailed Look (32‚ 31‚ 30‚ and 21 Program Options)
Panasonic bread machines boast extensive program selections. The SD-YR2540 features 32 programs‚ while the SD-YR2550 offers 31‚ and the SD-R2530 provides 30. Even the SD-B2510 includes 21 options. These programs cover a wide range of baked goods‚ from classic white bread and wholewheat loaves to specialized options like pizza dough and brioche.
Further versatility extends to cakes‚ doughs for pasta‚ and even homemade jams and jellies‚ simplifying diverse culinary creations.
Capacity and Loaf Size Options
Panasonic bread machines cater to varying household sizes. Models generally offer multiple loaf size options‚ typically including 1.5lb and 2lb loaves. This flexibility allows bakers to adjust batch sizes based on consumption needs‚ minimizing waste and ensuring freshness. Selecting the appropriate loaf size is crucial for optimal baking results.
Consider family size and bread consumption when choosing a loaf size setting‚ ensuring perfectly portioned baked goods every time.
Getting Started: Initial Setup and Preparation
Before your first bake‚ carefully unpack your Panasonic bread machine and identify all components. Remove any protective films or packaging materials. Thoroughly clean the bread pan‚ kneading blade‚ and all removable parts with warm‚ soapy water‚ then dry completely. This initial cleaning ensures a hygienic baking environment.

A test run – baking a simple loaf – is recommended to familiarize yourself with the machine’s functions and confirm proper operation before embarking on more complex recipes.
Unboxing and Component Identification

Your Panasonic bread machine package should include the main unit‚ bread pan‚ kneading blade‚ measuring cup‚ measuring spoon‚ and this instruction manual. Carefully remove all items‚ checking against the included parts list. Inspect each component for any shipping damage. The bread pan is typically non-stick coated‚ while the kneading blade fits securely into the bread pan’s shaft.
Familiarize yourself with each part’s function before proceeding to the cleaning and setup stages.

First-Time Use: Cleaning and Testing
Before your first bake‚ thoroughly clean the bread pan‚ kneading blade‚ and measuring tools with warm‚ soapy water. Wipe the main unit with a damp cloth – never immerse it in water! Run a practice cycle without any ingredients. Select a basic program‚ like ‘Basic’‚ and follow the start procedure. This removes any potential manufacturing residue and ensures proper functionality.
Observe the machine during this test run to confirm all operations are smooth and error-free.
Using the Control Panel
The control panel features buttons for program selection‚ crust color‚ loaf size‚ timer settings‚ and start/stop. The display shows the current program‚ remaining baking time‚ and any error codes. Familiarize yourself with each button’s function before starting. To set the timer‚ use the ‘Hour’ and ‘Minute’ buttons. Ensure the ‘Start’ button is pressed to initiate the baking cycle after setting your desired parameters.
Refer to the program chart for specific settings.
Understanding the Buttons and Display
Key buttons include ‘Menu’ for program selection‚ ‘Crust Color’ for light‚ medium‚ or dark crusts‚ and ‘Loaf Size’ for 1lb or 2lb loaves. The ‘Timer’ and ‘Start/Stop’ buttons control baking timing. The LCD display clearly shows the selected program number‚ baking stage (kneading‚ rising‚ baking)‚ remaining time‚ and any error messages. A flashing display indicates a setting is in progress or an error has occurred.
Consult the manual for specific code meanings.
Setting the Timer and Delay Start
Delay Start allows convenient baking by scheduling loaf completion. Press ‘Timer’ repeatedly to add hours‚ then press again to adjust minutes. Ensure sufficient time for the chosen program – typically 13+ hours. The display shows the target finish time. Remember ingredients like yeast are sensitive; avoid excessive delay with perishable additions.
Press ‘Start’ to activate the timer. Verify the display confirms the set delay before leaving the machine unattended.
Baking Your First Loaf: Basic White Bread Recipe
Beginner’s Delight! For a classic loaf‚ use 2.5 cups bread flour‚ 1 cup water‚ 2 tbsp sugar‚ 1.5 tsp salt‚ and 2 tsp dry yeast; Ensure yeast isn’t expired for optimal rise. Add ingredients to the pan in the order recommended by your model – typically liquids first‚ then dry‚ with yeast last.
Select the ‘Basic’ or ‘White Bread’ program‚ choose loaf size‚ and press ‘Start’ for bakery-style results!
Ingredient Measurement and Preparation
Precision is Key! Accurate measurements are vital for bread machine success. Use dry measuring cups for flour‚ sugar‚ and yeast; liquid measuring cups for water and oil. Level off dry ingredients for consistency. Room temperature water (around 80°F/27°C) activates yeast effectively.
Ensure yeast isn’t expired – test with warm water and sugar if unsure. Proper ingredient order‚ as specified in your model’s manual‚ impacts the final result.
Step-by-Step Baking Instructions
Let’s Bake! First‚ place ingredients into the bread pan following your recipe’s order. Secure the pan into the bread machine. Select the appropriate program – typically “Basic” for white bread – and loaf size. Press “Start.”
Monitor the initial mixing stage; adjust liquid slightly if dough seems too wet or dry. Avoid opening the lid during baking unless absolutely necessary. Upon completion‚ carefully remove the loaf using oven mitts. Cool completely before slicing and enjoying!
Advanced Baking Techniques
Expand Your Skills! For whole wheat bread‚ utilize the dedicated program and consider adding vital wheat gluten for improved rise. Gluten-free baking requires a specific program and a blend of gluten-free flours; xanthan gum is often essential.
Experiment with different flour types and hydration levels. Adjust baking times slightly based on your machine and ingredients. Remember‚ consistent results come with practice and careful observation of your dough’s texture.
Whole Wheat Bread Baking
Nutritious & Delicious! Panasonic machines feature dedicated whole wheat programs. However‚ whole wheat flour absorbs more liquid; increase hydration slightly. Adding 1-2 tablespoons of vital wheat gluten per loaf improves texture and rise‚ counteracting the flour’s density.
Experiment with different percentages of whole wheat flour‚ blending it with bread flour for optimal results. Monitor dough consistency – it should be slightly stickier than white bread dough.
Gluten-Free Bread Baking

Specialized Recipes Needed! Gluten-free baking requires a dedicated program and often a blend of gluten-free flours (rice‚ tapioca‚ potato starch). Panasonic machines offer gluten-free settings‚ but results vary.
Xanthan gum is crucial – it mimics gluten’s elasticity. Use 1-2 teaspoons per loaf. Gluten-free doughs are typically wetter; reduce liquid slightly if needed. Monitor closely‚ as gluten-free loaves often bake faster and may require a shorter cycle.
Dough Making Functions
Versatile Dough Options! Panasonic bread machines excel beyond bread‚ offering dedicated dough cycles for pizza‚ pasta‚ and enriched doughs like brioche. These cycles knead and rise the dough‚ then automatically stop‚ allowing for manual shaping and baking.
Pizza Dough benefits from a shorter cycle‚ while brioche requires longer kneading for optimal development. Remember to adjust ingredient quantities based on desired dough yield. The machine handles the labor-intensive kneading‚ saving you time and effort!
Pizza Dough Recipe and Instructions

Perfect Pizza Starts Here! Use the ‘Dough’ program on your Panasonic machine. Combine 1 ¼ cups warm water‚ 2 tsp sugar‚ 2 ¼ tsp yeast‚ 3 ½ cups bread flour‚ 1 tsp salt‚ and 2 tbsp olive oil in the pan. Select the ‘Dough’ cycle and press start.
Once complete‚ gently remove dough‚ divide‚ and shape. Let rest for 10 minutes before topping and baking at 450°F (232°C) for 12-15 minutes. Enjoy homemade pizza perfection!
Other Dough Options: Pasta‚ Brioche
Expand Your Dough Creations! Beyond pizza‚ the dough cycle excels with pasta. Use a semolina-based recipe‚ selecting the ‘Dough’ program. For rich brioche‚ combine flour‚ yeast‚ sugar‚ eggs‚ butter‚ and milk. The machine kneads beautifully‚ developing gluten for a tender crumb.
Remember to adjust liquid levels based on flour type. After the cycle‚ shape and proof dough before baking. Experiment – the possibilities are endless with your Panasonic bread maker!
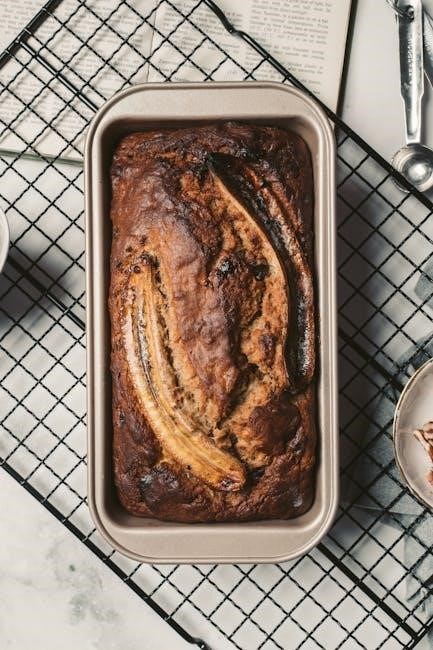
Sweet Bread and Dessert Recipes
Indulge Your Sweet Tooth! Your Panasonic bread machine isn’t just for loaves. Explore cake baking using dedicated programs – achieving moist‚ delicious results. From simple vanilla to chocolate delights‚ recipes are readily available. Beyond cakes‚ craft sweet breads like cinnamon swirl or challah‚ utilizing the dough cycle followed by baking.
Don’t forget jam and jelly! The machine simplifies preserving fruits‚ creating homemade spreads. Experiment with flavors and enjoy delightful homemade treats!
Cake Baking with Your Bread Machine
Surprisingly Delicious Cakes! The Panasonic bread machine excels beyond bread‚ offering a dedicated cake baking program. Achieving moist‚ evenly baked cakes is simpler than you think. Utilize recipes specifically designed for bread machines‚ ensuring proper ingredient ratios and mixing times.
Experiment with flavors – vanilla‚ chocolate‚ lemon – and enjoy homemade cakes without needing a conventional oven! Remember to grease the pan thoroughly to prevent sticking and ensure easy removal of your delightful creation.
Jam and Jelly Making
Homemade Preserves Made Easy! Your Panasonic bread machine isn’t just for baked goods; it’s a fantastic jam and jelly maker. The dedicated program simplifies the process‚ ensuring consistent results without constant stirring. Fresh fruit‚ sugar‚ and a touch of lemon juice are all you need!

Enjoy seasonal flavors preserved for year-round enjoyment. Always follow tested recipes for safe and delicious homemade spreads. Properly sterilized jars are crucial for long-term storage and preservation.
Troubleshooting Common Issues
Addressing Baking Challenges! Encountering problems? Lumpy loaves are a frequent concern‚ often caused by improper ingredient ratios or excessive moisture. Machine errors‚ indicated by specific codes‚ require referencing the manual for solutions.
Ensure ingredients are fresh and measured accurately. Check the kneading paddle for proper function. If issues persist‚ consult Panasonic’s support resources or explore online forums for community assistance. A little troubleshooting can save a lot of wasted ingredients!
Lumpy Loaves: Causes and Solutions
Fixing Uneven Texture! Lumpy loaves frequently stem from inaccurate ingredient measurements‚ particularly flour and liquids. Excessive moisture or improper yeast activation can also contribute. Ensure precise measurements using measuring cups and spoons.
Verify yeast freshness and activate it correctly. Adjust liquid levels slightly if needed. A kneading issue might also be the culprit; check the paddle’s functionality. Experiment with ingredient order – adding liquids last can help!
Machine Errors and Error Codes
Decoding Alerts! Your Panasonic bread machine utilizes error codes to signal issues. Common errors include power failures‚ paddle issues‚ or temperature sensor malfunctions. Consult the manual for a complete list of codes and their meanings.
If an error occurs‚ first try restarting the machine. Ensure the power cord is securely connected and the paddle is correctly installed. If the error persists‚ contact Panasonic customer support for assistance and potential repair options.
Cleaning and Maintenance
Keep it Fresh! Regular cleaning ensures optimal performance and longevity. Always unplug the machine before cleaning. The baking pan and kneading paddle are removable and dishwasher-safe‚ or can be washed by hand with warm‚ soapy water.
Wipe the machine’s exterior with a damp cloth. Avoid abrasive cleaners. For long-term storage‚ ensure all components are dry. Proper care prevents buildup and maintains consistent baking results‚ extending your machine’s lifespan.
Proper Cleaning Procedures
Detailed Steps! After each use‚ unplug the machine and allow it to cool. Remove the baking pan and kneading paddle. Wash these components with warm‚ soapy water‚ or place them in the dishwasher. Wipe the machine’s exterior with a damp cloth – avoid harsh chemicals.
Inspect the heating element and ensure it’s free of debris. Dry all parts thoroughly before reassembling. Consistent cleaning prevents residue buildup‚ ensuring fresh-tasting bread and extending the machine’s life.
Long-Term Storage and Care
Preserving Your Machine! If storing for extended periods‚ ensure the bread machine is completely dry and clean. Store in a cool‚ dry place‚ away from direct sunlight. Avoid stacking heavy items on top‚ which could damage the unit.
Periodically check the power cord for any signs of wear or damage. Proper storage safeguards against dust accumulation and potential malfunctions‚ guaranteeing years of reliable baking performance. Regular maintenance is key!
Safety Precautions
Important Guidelines! Always unplug the bread machine before cleaning or performing maintenance. Never immerse the main unit in water or any other liquid. Exercise caution when handling hot surfaces‚ like the baking pan‚ immediately after use – allow cooling first.
Keep the power cord away from hot surfaces. Supervise children when the machine is in operation. Do not operate the appliance with a damaged cord or plug. Prioritize safety for enjoyable baking!
Important Safety Guidelines
Read Carefully! To prevent electrical shock‚ never operate with a damaged cord or plug. Avoid immersing the unit in water. Always unplug before cleaning. Hot surfaces remain so during and immediately after baking – use oven mitts!
Keep the appliance away from flammable materials. Ensure proper ventilation during operation. Supervise children closely. Do not attempt repairs yourself; contact authorized service personnel. Prioritize these guidelines for safe and delicious baking experiences.
Recipe Resources and Further Information

Expand Your Baking! Explore Panasonic’s official website for additional recipes and support. Online communities and forums dedicated to bread making offer valuable tips and shared experiences with models like the SD-R2550.
Amazon and other retailers often feature user reviews and recipe suggestions. Consider cookbooks specializing in bread machine baking for diverse options. Remember‚ experimentation is key – adapt recipes to your preferences and enjoy the journey of perfecting your homemade loaves!