Signode delivers robust strapping solutions; this manual aids operation, ensuring safety and efficiency․ Several strap types are compatible, requiring correct Signode products․
1․1 Signode: A Leading Manufacturer
Signode stands as a premier global provider of strapping and packaging solutions, renowned for engineering durable and reliable machinery․ Originating in the USA, specifically Glenview, Signode has a long-standing history of innovation in the industrial packaging sector․ Their commitment extends beyond manufacturing; they offer comprehensive support, including detailed manuals like this one, to ensure optimal performance and longevity of their equipment․
The company’s dedication to quality is reflected in products like the BXT3 series (BXT3-13, BXT3-16, BXT3-19) and the AK200HDX series (AK200HDX-19), catering to diverse packaging needs․ Signode prioritizes safety, evidenced by adherence to directives like 2006/42/EEC, and provides translated manuals for international users․ Contacting a Signode representative is encouraged for application-specific guidance․
1․2 Overview of Strapping Machine Types
Signode offers a diverse range of strapping machines to suit various packaging requirements․ This includes battery-operated hand tools, exemplified by the BXT3 series – models BXT3-13, BXT3-16, and BXT3-19 – providing portability and convenience․ For higher volume applications, Signode manufactures power strapping heads, such as the AK200HDX series (AK200HDX-19, AK200HDX-25, AK200HDX-32), designed for integration into automated systems․
The LBX-2000 is another notable machine, built for robust performance․ These machines accommodate different strap materials, and selecting the correct Signode product is crucial․ Understanding the specific needs of your packaging process – volume, material type, and operational environment – will guide the selection of the most appropriate Signode strapping solution․ This manual covers operation and safety for these tools․
1․3 Importance of the Manual
This Signode strapping machine manual is a critical resource for safe and effective operation․ Before utilizing any Signode equipment, thoroughly review each section, paying close attention to safety instructions and operational procedures․ The manual details essential information, including machine set-up, installation guidelines, and troubleshooting steps․
Understanding disconnect and lockout procedures, as outlined within, is paramount for preventing accidents․ Proper maintenance schedules and cleaning procedures are also detailed to ensure longevity and optimal performance․ This document, translated according to Machine Directive 2006/42/EEC, simplifies setup and usage․ Adhering to the guidelines within will maximize efficiency and minimize potential risks associated with operating this powerful equipment․
SECTION 2: Machine Set-Up and Installation
Proper installation involves unpacking, inspection, correct air supply connection, and—if applicable—electrical connection, all detailed within this manual for optimal performance․
2․1 Unpacking and Inspection
Upon receiving your Signode strapping machine, carefully inspect the shipping container for any signs of damage incurred during transit․ Document any visible damage immediately with photographs and detailed notes, and file a claim with the carrier․ Once the packaging is removed, thoroughly inspect the machine itself․

Verify that all components listed in the packing list are present․ Check for loose parts, scratches, or any other anomalies․ Ensure all safety guards and covers are securely attached․ If any parts are missing or damaged, do not attempt to operate the machine․ Contact your Signode representative immediately to arrange for replacements․ Retain all packaging materials until the inspection is complete and you are satisfied with the condition of the machine․
2․2 Initial Machine Placement
Carefully position the Signode strapping machine on a stable, level surface capable of supporting its weight and the anticipated load․ Ensure sufficient clearance around the machine for safe operation and maintenance access – at least 3 feet on all sides is recommended․

Avoid placing the machine in damp or corrosive environments․ The area should be well-lit and free from obstructions․ Consider the proximity to power sources and air supply lines, ensuring they are within reach and properly configured․ Prior to connecting utilities, verify the machine is grounded according to local electrical codes․ Proper placement is crucial for both operator safety and optimal machine performance․
2․3 Air Supply Requirements
The Signode strapping machine requires a clean, dry, and regulated air supply to function correctly․ Operating air pressures must not exceed the limits specified on the machine’s data plate – exceeding these pressures can cause damage or malfunction․ A minimum air supply of [insert PSI/Bar value from manual] is generally required for optimal performance․
Utilize an air compressor with sufficient capacity to meet the machine’s demands․ Install an air filter and regulator to remove moisture and maintain consistent pressure․ Regularly drain the air compressor tank to prevent corrosion․ Inspect air hoses for leaks or damage before each use․ Proper air supply is vital for consistent tensioning and sealing․
2․4 Electrical Connection (If Applicable)
If your Signode strapping machine requires an electrical connection, ensure it is performed by a qualified electrician and adheres to all local and national electrical codes․ Verify the machine’s voltage and frequency requirements match your power supply before connecting․ Always disconnect the power supply before performing any maintenance or inspections․
The electrical diagram, found in Section 5, details the wiring configuration․ Use appropriately sized wiring and ensure proper grounding to prevent electrical shock․ Regularly inspect the power cord for damage and replace if necessary․ Adhere strictly to all safety precautions outlined in Section 5 to avoid hazards․

SECTION 3: Operating Instructions ― LBX Machine
The LBX machine, built in the USA by Signode, requires careful operation; always consult the manual for disconnect and lockout procedures before use․
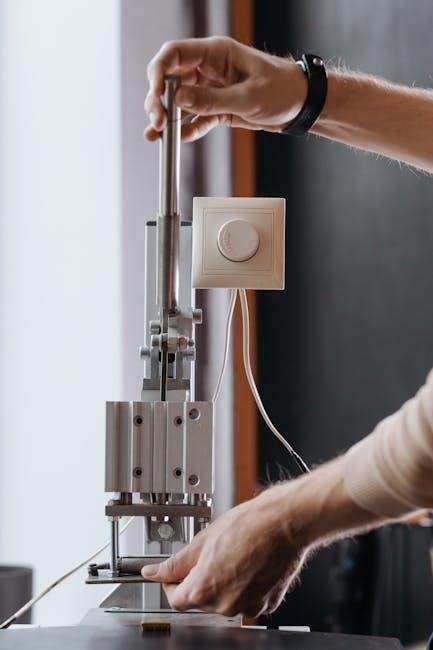
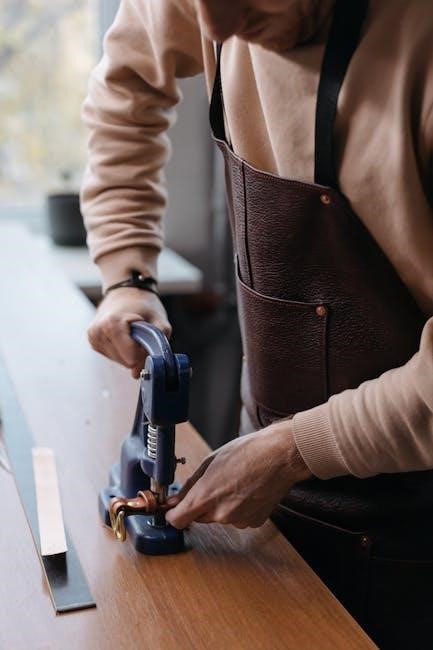
3․1 LBX Machine Components
Understanding the LBX machine’s components is crucial for safe and effective operation․ This tool, a battery-operated solution for plastic strapping, features a sophisticated design․ Key elements include the strapping head, responsible for tensioning and sealing, and the battery pack powering the device; The dispenser manages strap feed, ensuring smooth operation․ Familiarize yourself with the control panel, which governs functions like tension and cycle start․
The BXT3 series (BXT3-13, BXT3-16, BXT3-19) share similar component layouts․ Proper identification of each part, as detailed in the full manual, is essential for maintenance and troubleshooting․ Always refer to diagrams within the documentation for precise locations and functions of each component before attempting any adjustments or repairs․
3․2 Strapping Material Selection
Selecting the correct strapping material is paramount for secure packaging and optimal machine performance․ Signode recommends utilizing their specifically designed products for compatibility and reliability․ Various strap types exist, each suited for different applications and load weights․ Consider the package’s size, weight, and environmental conditions when choosing․
Using non-approved materials can damage the machine and compromise package integrity․ The manual emphasizes the importance of adhering to Signode’s recommendations․ Ensure the strap width aligns with the strapping head’s specifications (e․g․, AK200HDX-19 handles 19/25/32 mm straps)․ Always consult the product data sheets for load capacity and material properties before use․
3․3 Threading the Strapping
Proper strapping threading is crucial for consistent operation of the LBX machine․ Begin by ensuring the strap reel is correctly installed and the strap end is cleanly cut․ Guide the strap through the designated path within the frame and dispenser, following the illustrated diagrams in the manual․
Carefully feed the strap through the tension unit and into the sealing head, ensuring it’s properly aligned with the sealing jaws․ Avoid kinks or twists, as these can cause malfunctions․ The manual details specific threading procedures for different strap types and machine configurations․ Always verify correct threading before initiating the tensioning and sealing process to prevent jams or damage․
3․4 Tensioning and Sealing Process
The LBX machine’s tensioning and sealing process ensures secure package consolidation․ After threading, initiate the cycle; the machine will automatically draw the strap tight around the package․ Adjust tension settings according to the material being strapped, referencing the manual’s guidelines․
Once the desired tension is reached, the sealing head descends, fusing the strap ends together․ Proper sealing relies on correct temperature and pressure settings, detailed within the manual․ Inspect each seal for integrity; a secure seal is vital for preventing package shifting during transit․ Refer to troubleshooting if seals are weak or fail․

SECTION 4: Maintenance and Troubleshooting
Signode machines require regular upkeep for optimal performance․ This section details maintenance schedules, cleaning, common issues, and wear part replacement procedures․
4․1 Regular Maintenance Schedule
To ensure consistent and reliable operation of your Signode strapping machine, adherence to a regular maintenance schedule is crucial; Daily checks should include visual inspections for wear and tear on key components, such as the strapping head and dispenser․ Weekly, thoroughly clean the machine, removing any debris or strapping residue․ Monthly, inspect and lubricate moving parts as detailed in the full manual․
Furthermore, quarterly assessments should involve a detailed examination of the air supply lines for leaks and proper pressure․ Annually, a qualified technician should perform a comprehensive inspection, including electrical connections and safety features․ Following this schedule minimizes downtime, extends the machine’s lifespan, and maintains operational safety․ Refer to the complete Signode manual for specific lubrication points and recommended intervals․
4․2 Cleaning Procedures
Maintaining a clean Signode strapping machine is vital for optimal performance and longevity․ Before any cleaning, disconnect and lockout the machine’s power source to prevent accidental operation․ Regularly remove accumulated dust, dirt, and strapping debris from all surfaces, particularly around the strapping head and dispenser․
Use a soft brush or compressed air to dislodge particles․ Avoid using harsh chemicals or abrasive cleaners, as these can damage components․ For stubborn residue, a mild detergent solution can be applied with a damp cloth, ensuring the machine is thoroughly dried afterward․ Pay close attention to cleaning the sealing mechanism to ensure consistent seal quality․ Consult the full Signode manual for specific cleaning recommendations and approved cleaning agents․
4․3 Common Troubleshooting Issues
Several issues may arise during Signode strapping machine operation․ If the machine fails to cycle, check the air supply pressure and electrical connections․ Weak seals often indicate insufficient tension or a dirty sealing head – clean it thoroughly․ Strapping jams can occur due to improper threading or debris in the path; re-thread carefully and remove obstructions․
For battery-operated models (like the BXT3 series), ensure the battery is fully charged․ Consult the Signode manual’s troubleshooting section for detailed diagnostics and solutions․ If problems persist, record the error details and contact a qualified Signode service technician․ Never attempt repairs beyond your expertise, as this could void the warranty or create a safety hazard․
4․4 Replacing Wear Parts
Regularly replacing wear parts extends your Signode machine’s lifespan and maintains optimal performance․ Key components requiring periodic replacement include the sealing head components, cutting blade, and air filter․ Refer to the Signode manual for specific part numbers and recommended replacement intervals․
Always disconnect the machine from the power source and air supply before performing any maintenance․ Use genuine Signode replacement parts to ensure compatibility and reliability․ The AK200HDX series, for example, has specific head maintenance procedures detailed in its manual․ Proper installation is crucial; consult diagrams within the manual for guidance․ Dispose of worn parts responsibly, following local regulations․
SECTION 5: Electrical Information
Signode machines may require specific electrical connections; consult the manual for diagrams and safety precautions, including fuse replacement procedures․
5․1 Electrical Diagram
Crucially, the electrical diagram within your Signode strapping machine manual provides a detailed visual representation of the machine’s electrical system․ This diagram illustrates all wiring connections, component locations, and electrical pathways․ Carefully study this diagram before performing any electrical work or troubleshooting․ It’s essential for understanding the power supply requirements, identifying key components like fuses and motors, and ensuring safe and correct electrical maintenance․
The diagram typically includes labeled wires, connectors, and components, often with voltage and amperage specifications․ Always disconnect the power supply before referencing or working with the electrical system․ Incorrect wiring or component replacement can lead to machine malfunction or pose a serious safety hazard․ Refer to the manual’s safety section alongside the diagram․
5․2 Safety Precautions ⸺ Electrical
Prioritize electrical safety when servicing your Signode strapping machine․ Always disconnect the main power supply and implement lockout/tagout procedures before inspecting, maintaining, or repairing any electrical components․ Never work on live circuits․ Ensure the machine is properly grounded to prevent electrical shock․ Only qualified personnel should perform electrical work, adhering to all local and national electrical codes․
Inspect power cords and plugs for damage before each use; replace damaged components immediately․ Avoid exposing electrical parts to water or moisture․ Be aware of potential pinch points and moving parts near electrical components․ Refer to the electrical diagram in the manual for component identification and voltage ratings․ Failure to follow these precautions can result in severe injury or death․
5․3 Fuse Replacement
Before replacing any fuse, always disconnect the machine from the power source to prevent electrical shock․ Identify the correct fuse type and amperage rating as specified in the electrical diagram – using an incorrect fuse can create a fire hazard or damage the machine․ Locate the fuse holder, typically near the power entry point․ Carefully remove the blown fuse and install a new fuse of the exact same rating․
Ensure the new fuse is securely seated in the holder․ If the fuse blows repeatedly, do not continue to replace it; this indicates an underlying electrical problem that requires professional attention․ Contact a qualified technician for diagnosis and repair․ Never bypass or bridge a fuse․
SECTION 6: Frame and Dispenser Information
Frame assembly details and dispenser adjustments are crucial for optimal strap feeding․ Correct strap reel installation ensures smooth, reliable operation of the machine․
6․1 Frame Assembly Details
Proper frame assembly is fundamental to the stability and performance of your Signode strapping machine․ Ensure all components are securely fastened according to the diagrams provided within this manual․ Verify that the frame stands level on the designated surface to prevent operational issues and maintain consistent strap alignment․
Inspect all bolts and connections regularly for tightness, especially after initial setup and during routine maintenance․ A wobbly or misaligned frame can lead to inaccurate strapping and potential safety hazards․ Refer to the parts list to confirm you have all necessary hardware․
Pay close attention to any specific instructions regarding the orientation of frame members, as incorrect assembly can compromise the machine’s structural integrity․ Always disconnect power before performing any frame adjustments or repairs․
6․2 Dispenser Adjustment
Precise dispenser adjustment is crucial for smooth and reliable strap feeding․ This manual details how to modify tension settings to accommodate various strap widths and coil sizes․ Begin by loosening the adjustment knobs on the dispenser assembly, allowing for free movement․ Carefully align the strap path to minimize friction and prevent binding․
Gradually tighten the knobs, ensuring the strap remains centered and feeds consistently․ Over-tightening can restrict strap flow, while insufficient tension may cause coil unwinding issues․ Regularly inspect the dispenser rollers for wear and tear, replacing them as needed to maintain optimal performance․
Refer to the troubleshooting section if you encounter persistent feeding problems․ Correct dispenser adjustment minimizes downtime and maximizes strapping efficiency․
6․3 Strap Reel Installation
Proper strap reel installation is fundamental for uninterrupted operation․ This manual guides you through safely mounting a new coil onto the dispenser․ First, ensure the machine is powered off and locked out․ Carefully lift the strap reel, verifying it’s compatible with your Signode machine․
Position the reel onto the dispenser shaft, aligning the core with the mounting features․ Secure the reel using the provided retaining clamps or locking mechanisms, tightening them firmly but avoiding over-compression․ Ensure the strap end feeds smoothly into the threading path․
Inspect the reel for damage before installation․ A damaged reel can cause operational issues․ Refer to the diagrams within this manual for correct orientation and securing procedures․
SECTION 7: Strapping Head Information ― AK200HDX Series
The AK200HDX series heads, like the AK200HDX-19, require specific maintenance for optimal performance; consult this manual for detailed procedures and specifications․
7․1 AK200HDX-19 Head Specifications
The AK200HDX-19 strapping head is engineered for high-performance plastic strapping applications․ This head is specifically designed to handle 19mm, 25mm, and 32mm polypropylene (PP) and polyethylene terephthalate (PET) straps․ It’s crucial to verify strap compatibility before operation․
Key specifications include a maximum tension force of [insert specific value from manual – not provided in source text], and a sealing type utilizing heat and pressure for secure closures․ The head’s robust construction ensures durability in demanding industrial environments․ Proper operation requires adherence to recommended air pressure settings, detailed within this manual․
Refer to the detailed electrical diagrams and safety precautions outlined in SECTION 5 to ensure safe and efficient operation of the AK200HDX-19 head․ Always consult the full manual for complete specifications and maintenance guidelines․
7․2 AK200HDX Head Maintenance
Regular maintenance of the AK200HDX head is vital for optimal performance and longevity․ Frequent inspection of sealing components is crucial, checking for wear or damage․ Cleaning the head regularly prevents debris buildup, ensuring consistent sealing․
Lubricate moving parts as outlined in SECTION 4, using only recommended lubricants to avoid compatibility issues․ Periodically check and tighten all fasteners to prevent loosening during operation․ Inspect air lines for leaks, addressing any issues promptly to maintain consistent tensioning․
Refer to the parts manual for exploded views and replacement part numbers․ Following the maintenance schedule detailed within this manual will minimize downtime and extend the life of your AK200HDX strapping head․
7․3 Sealing Mechanism Details
The AK200HDX sealing mechanism utilizes a robust hot-wedge system to create secure strap joints․ This system relies on precise temperature control and consistent pressure application․ The heating element melts the strap material, fusing the overlapping layers together․ Proper alignment of the strap within the sealing jaws is critical for a reliable seal․
Regularly inspect the sealing jaws for wear or damage, replacing them as needed to maintain seal integrity․ Ensure the temperature setting is appropriate for the strap material being used․ Incorrect temperature settings can result in weak or inconsistent seals․ Refer to SECTION 3 for optimal settings․
Maintaining a clean sealing surface is essential; debris can interfere with the fusion process․